Showing posts with label knitting. Show all posts

Sunday, November 16, 2014

The Knits of Others

I certainly can appreciate the hard work of my fellow knitting pattern makers and I thought I'd show off a couple pieces that I knit this year based on the the patterns of others.

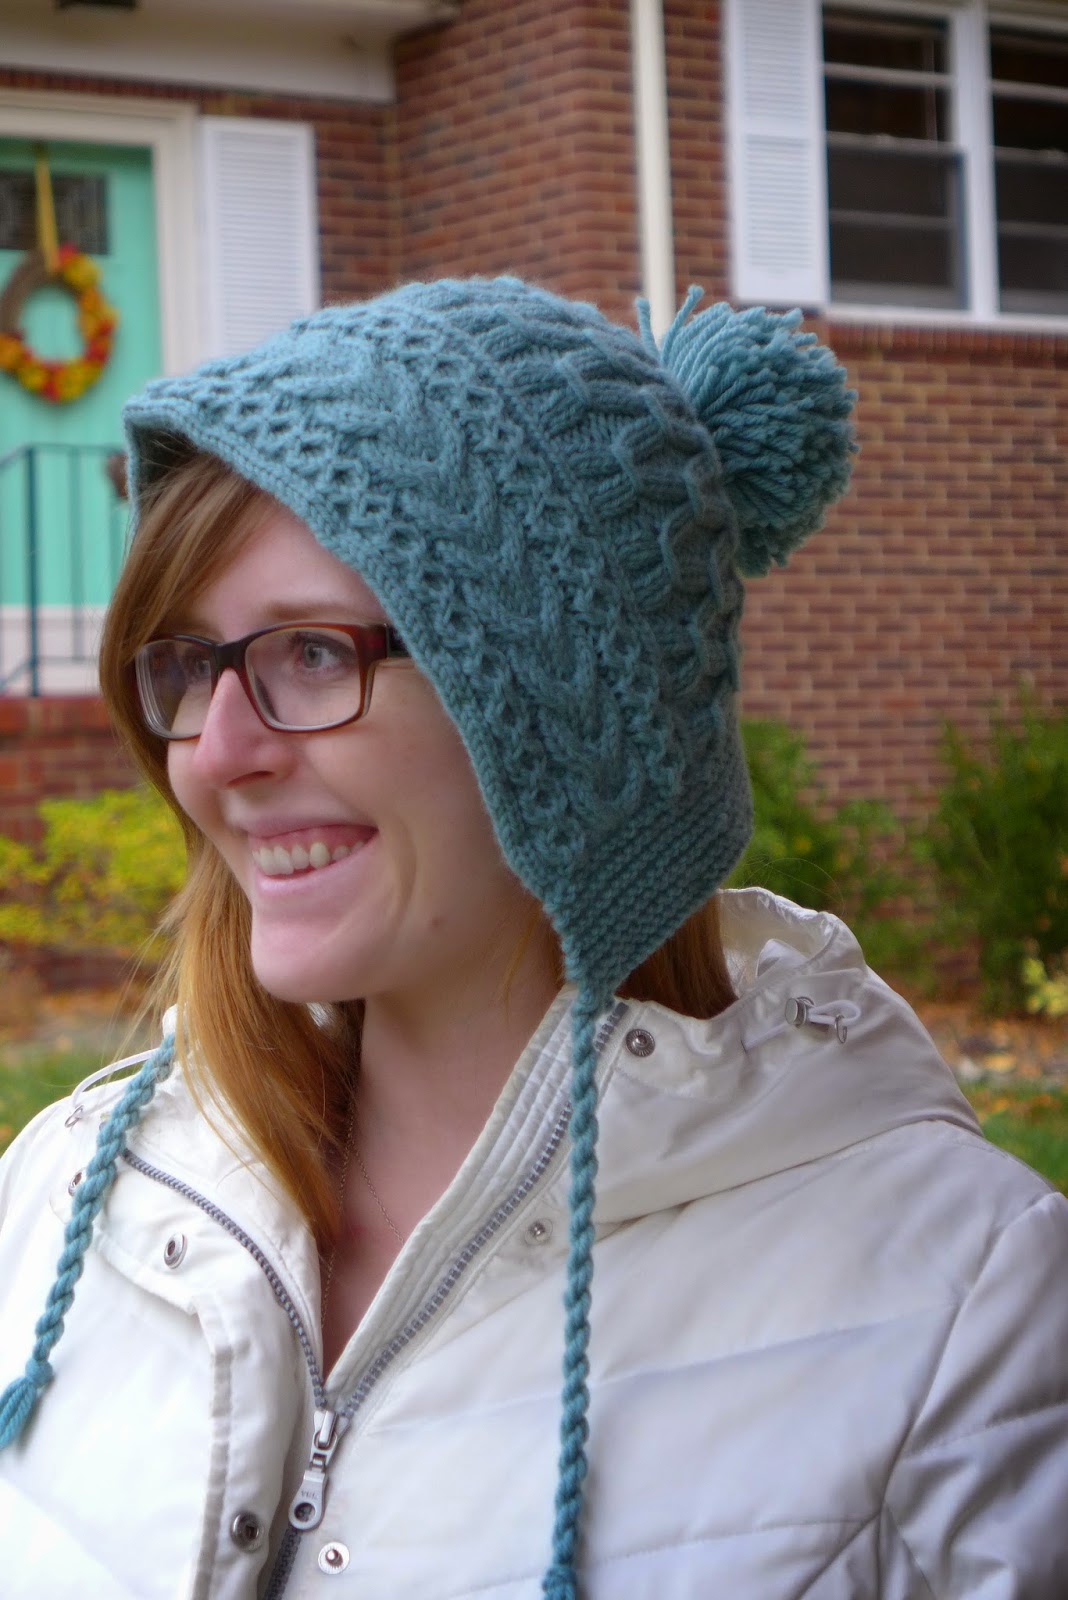
Pattern #1: Neon Ski Bonnet by Lacey Volk. 

This pattern was FREE on ravelry.  Can you beleive it? It's adorable. I did not do as instructed and block my pieces so I ended up blocking the whole thing at the end giving it a weird little peak because I blocked it folded in half. I think it will wear out with some time but just another reminder to follow instructions!


Need I say more?


Pattern #2: Northman Mittens By David Sholtz

Okay this pattern isn't free but i just couldn't get over it and I have been able to adapt the pattern into a variety of other items including ear muffs and baby mitts (sadly none of which I photographed before giving away). I made the mittens last year for my sister and liked them so well that I had to make a pair for myself. They are SO warm and cozy. Perfect for the cold winter that we are being promised this year.

Warning: I have found that they run very small (granted I didn't block them surprise surprise).


I love the fact that they are lined with the surprise cranberry color!


What are some of your favorite knitting patterns?

Monday, October 6, 2014

Owlet Sweater Love

Omg babies. This blogger is officially creating life! ...It's not as magic as it sounds, I promise. Beyond, you know, the joys and wonderment of motherhood and all that, do you know how many awesome baby knits I get to do now!?

For way too long I have had an unhealthy interest in this adorable owlet sweater by Kate Davies.

http://katedaviesdesigns.com/designs/owlet/

I know, it's just too much.

While it goes against my general distaste for buying patterns I just could not resist the very reasonable $7 price tag for this sweater pattern. Bonus: also available in adult size.

What patterns are striking your fancy these days?

Friday, September 19, 2014

TT Cowl


The TT cowl is a slightly adapted version of this lovely pattern generously offered for free on revelry by Marilyn Phillippi. I used the same yarn that was used in the Vicki Fingerless Gloves.

My cowl is slightly less wide with  fewer buttons than the original. Also, I confess that it could clearly use some steam blocking but it's such a cozy little knit! Here is an important lesson learned: Use stitch-makers! Can you get by without them?....sure, but seriously, why did I give myself the heartburn of stitches dropped in mysterious locations? Lesson learned. Stitch markers are now my best friend.

As we head into fall, I just can't get enough of these transitional knits! How does the season affect your knitting habits?


Wednesday, November 21, 2012

Brittany Scarf


Do you remember the scarf/hood I talked about knitting for my sister last year for Christmas? Of course you don't, it was LAST YEAR! Since I'm bringing it up you might think that maybe I am finally going to post come completed pictures of it...sadly no, I was so burnt out by the time I completed the scarf I didn't bother taking any, but I did run across some "in progress" photos that I that I should share. And hopefully I will catch my sister wearing it this Christmas and I can snap a few completed shots.


Colorful Knit Scarf
 Did I mention that this scarf has POCKETS? That's why you see the pattern on both the front and back of the scarf. I knitted on one side for a bit and then switched sides (my front became my back and my back became my front) so I could fold over the end and stitch up the sides to make a pocket.

Colorful Knit Scarf


Yarn Used: Malabrigo Rios Yarn    NS:6-8
Color: ARCOIRIS Arco Iris
Skeins Used: 5
Note: Dye lots vary GREATLY to the point of looking like a different color blend so it's better to get too much yarn and return some than have to little and have to buy one skein from a different dye lot.

I have not included the hood pattern but here is the scarf pattern with and without pockets:

Abbriviations:


RC-P = Slip 1 to back, K4 then P1 from Cable needle
LC-P = Slip 4 to front, P1 then K4 from Cable needle

Moss =                 Even Rows: K1 P1 across the row
                Odd Rows: Knit the purls and purl the knits
(If you started with K1 on the front side, you will start with K1 on the back side as well)
Stockinette: K on front side, P on back side


Pattern:
Cast on 40 stitches
Moss for 6 rows

A. 5 moss, P4, K1, P7, K6, P7, K1, P4, 5 moss
B. 5 moss, K4, P1, K7,P6, K7, P1, K4, 5 moss

1.   5 moss, P4, K1, P6, RC-P, LC-P, P6, K1, P4, 5 moss
2.   5 moss, K4, P1, K6, P3, K2, P3, K6, P1, K4, 5 moss
3.   5 moss, P4, K1, P5, RC-P, P2, LC-P, P5, K1, P4, 5 moss
4.   5 moss, K4, P1, K5, P3, K4, P3, K5, P1, K4, 5 moss
5.   5 moss, P4, K1, P4, RC-P, P4, LC-P, P4, K1, P4, 5 moss
6.   5 moss, K4, P1, K4, P3, K6, P3, K5, P1, K4, 5 moss
7.   5 moss, P4, K1, P3, RC-P, P6, LC-P, P3, K1, P4, 5 moss
8.   5 moss, K4, P1, K3, P3, K8, P3, K3, P1, K4, 5 moss
9.   5 moss, P4, K1, P3, LC-P, P6, RC-P, P3, K1, P4, 5 moss
10. 5 moss, K4, P1, K4, P3, K6, P3, K4, P1, K4, 5 moss
11. 5 moss, P4, K1, P4, LC-P, P4, RC-P, P4, K1, P4, 5 moss
12. 5 moss, K4, P1, K5, P3, K4, P3, K5, P1, K4, 5 moss
13. 5 moss, P4, K1, P5, LC-P, P2, RC-P, P5, K1, P4, 5 moss
14. 5 moss, K4, P1, K6, P3, K2, P3, K6, P1, K4, 5 moss
15. 5 moss, P4, K1, P6, LC-P, RC-P, P6, K1, P4, 5 moss
16. 5 moss, K4, P1, K7, P6, K7, P1, K4, 5 moss

Without Pockets:
Repeat rows 1-16 until you reach desired length. Moss 6 rows and cast off. 

With Pockets.
Repeat rows 1-16 two times. Then knit a reverse stockinette stitch for 4 rows. Then knit a regular stockinette stitch until you can fold your stockinette panel over and have it reach the moss stitches you did to start your scarf (about 7"). Now your going to flip sides, your front will become your back and your back will become your front. All this means is that you knit an odd number of rows on your stockinette stitch (so you end with a K row). Then you begin the pattern again from just after the moss rows. Repeat rows 1-16 until the scarf is the length that you want. (include the unfolded pocket in your length assessment because you still have to knit the back of the second pocket).
Once you are happy with the scarf length, flip sides again and begin a stockinette stitch. You will be beginning on the back side of the stitch (i.e. you will start with your P row). Knit until the length of the stockinette matches the stockinette stitch on the other end of the scarf. Knit 4 rows in reverse stockinette stitches and knit rows 1-16 three times, Knit rows A & B, moss 6 rows and cast off.
Fold over each pocket at the reverse stockinette stitches and stitch the sides with an extra length of yarn.


Thursday, November 1, 2012

Spring Sweater (Part 2)

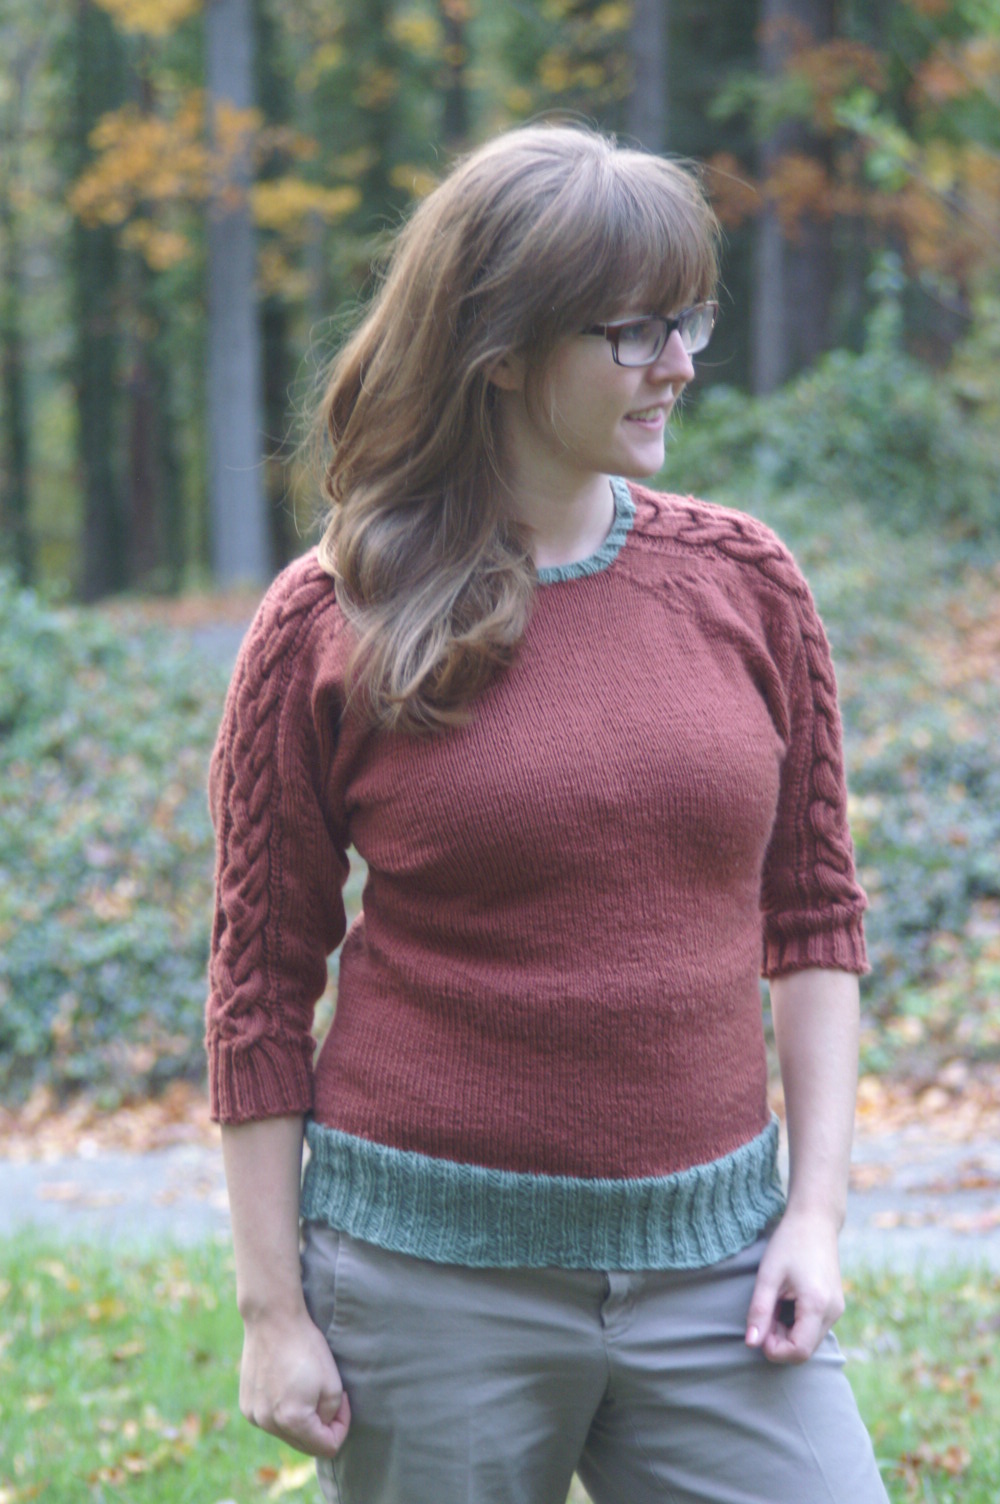
As promised...here is my finished sweater and just in time for winter....


I am not entirely happy with the finished product. In a perfect world I would tear out the top half and make it wider so I could have the droopy sleeves that I had envisioned for the sweater and I also WILL need to re-knit the neck as the cast off was waaaay too tight. In the mean time though, here is a good look at my first sweater attempt and as well as a lesson in why patterns might not be such a bad idea after all....

Yarn Used: Mission Falls 136 Merino Superwash
Color: 009 (Red) & 019 (Green)

I have completely lost track of the number of skeins used... maybe 10 at 136 yards each?

The good news is the holiday season is rolling around again and I am confident that I will do much better documentation of my holiday knit gifts than I did last year.(although some of them may not make their debut on this blog until after the new years for obvious reasons)  I have also come up with a new pattern for one project that I am very pleased with so far!

Wednesday, October 31, 2012

Gingerbread Hat


I have finished my sweater! I know...that photo above is not a picture of a sweater. I will blame Sandy (the hurricane) for making poor photography conditions so I don't have any pictures yet but  they are coming!  In the mean time, I had a friend request a new hat so here is a Gingerbread Hat that I completed last week.

Knit Gingerbread Hat

Knit Gingerbread Hat


I don't normally follow patterns but I decided to give it a try. I made the brim a few stitches longer than the directions called for but otherwise I followed the pattern. I used the largest hat size the pattern offered and despite being doubtful about sizing and the top closure while I was knitting, I am very happy with the results. It was a great quick knitting project.

Revelry offers the pattern for free [here] 

Yarn Used: malabrigo Worsted 100% Merino Wool  NS: US 7-9(knit with a size 8)
Color: 52 Paris Night

The skein was about 210 Yards and I didn't even come close to using the whole thing.

Thursday, March 29, 2012

Spring Sweater

After receiving a lovely set of wood knitting needles for Christmas I decided to pursue my first sweater project. My logic is if you start a sweater in the spring, you can have it finished by the time fall rolls around.  As usual, I am winging it with no pattern so it could go either way but it will almost certainly teach me allot and I have had allot of fun designing the sweater. So far I have finished the arms and have barely started on the body of the sweater. Below you can see the pattern on each arm. I will hopefully have a body to attach them to before too long.

Monday, November 7, 2011

Owl Shot

The knit owl discovery that I talked about earlier (yes, that hat is still in the works) got my creative juices flowing and I decided to try a little knit owl craft as a house warming gift for my good friend, Jess. After knitting the owl, my husband suggested I embroider a branch for it to sit on... so I did. and here you have it!

Knit Owl Picture

Where's Waldo's grey debut

While this year's Christmas projects are still underway, I thought I'd show you a project from last Christmas. It's a pretty simple hat I knit for my brother (who is the handsome model in this picture). This was my first, well maybe second, lesson in changing yarn colors as I knit, and certainly the first knit pom-pom. knitting tip: pom poms will take way more yarn than you think so plan accordingly. Until next time, enjoy this hat and my studly little brother!

Thursday, October 20, 2011

Missin' Mission Neck Warmer

I realized that it's somewhat strange that my first crafting article on a knitting focused blog was not about knitting. So, I thought I'd follow up with a recently completed knitting project of mine; a neck warmer in my favorite brand of yard, mission falls, which I am sad to say, recently went out business. (I do have plans to take advantage of this unfortunate news however, and stock up on yarn at closeout prices.) This was my first pursuit into the world of cables and I must say I was delighted to find that this was not nearly as complicated as I had initially anticipated.

Knit Neck Warmer

Knit neck Warmer

Sadly, I cant remember the exact pattern I came up with for the scarf but I'll tell you what I can remember:

Materials: 2 Skeins Mission Falls 136 Merino Superwash (color 022)
                One colorful button
The edges and ends are a moss stitch and I used three eight-stitch cables with three or four garter stitches between them.

I am writing the pattern from memory so I could be a bit off, but this should get you close:

Stitches used:
moss stitch
garter stitch
eight-stitch cable

Cast on 53 stitches
Row 1-12: moss stitch row
Row 13: K1,*P1, K1 repeat from * 8 sts, K3, C8F, K4, C8F, K4, C8F, K4, P1,*K1,P1, repeat from * 8 sts
Row 14: K1,*P1, K1 repeat from * 8 sts, K3, P8, K4, P8, K4, P8, K4, P1,*K1,P1, repeat from * 8 sts
Row 15: K1,*P1, K1 repeat from * 8 sts, K35, P1,*K1,P1, repeat from * 8 sts
Row 16-17: Repeat rows 10 & 11
Repeat rows 13-17 as many times as necessary until the scarf is about 24"-26" long and then add a button hole. There are a number of videos online that can help you if you don't know how to add a button hole. Make sure to size the hole for whatever button you plan to add at the end.
I located my button hole just inside the moss stitches on the edge but it can really be located anywhere between moss stitch edging.
Once the button hole is added, repeat rows 13-17 four or five more times and then finish the neck warmer by repeating rows 1-8 and bind off.

Sew on your button with an extra bit of yarn and you're all set to enjoy your new neck warmer!

Wednesday, October 19, 2011

Welcome to KnitKnots

As an armature knitter and crafter I have been lavishing my friends and family with mediocre homemade gifts for years. As I slowly begin to develop my still novice skills, I thought that a blog would be a good avenue to document my progress and maybe remind some other aspiring crafters out there that you have to start somewhere.

I grew up in a creative family with a mother gifted in every aspect creativity. A master seamstress (who hand-made my wedding dress), a knitter (who spins her own yarn) and blesses us with home-made wool socks each year for Christmas, and a painter who specializes in watercolors. As such, I have naturally dabbled in my fair share of crafting and artistry. After years of making knit stitch scarves, I picked up the knitting directory on a whim in the clearance section of Barnes and Nobles.  Let me just say, it may have been the best $6 I've ever spent. While I am still knitting on a relatively small scale (scarves, hats, gloves etc..) my knitting knowledge has exploded and I am growing dangerously close to pursuing a lager endeavor such as a sweater.

Sadly, since most of my previous work was made as gifts I don't have many pictures to share but I recently made a neck warmer and just started on a hat for my nephew so pictures are on their way....