Monday, December 17, 2012

Keep Calm and Carry Yarn

I had planned on having a blog on how to wrap presents but since no one reads this blog anyway I am hoping that my imaginary readers will not mind that I didn't get around to putting one together. It's Christmas, I'm busy, you understand, right?

So as a replacement for the present blog, you get to read about the a yarn bags that I worked on this Christmas. I even used the bag as the wrapping for another present so this almost counts as a present wrapping post!...shut up I tried....


Okay so moving on, I have been looking for good options for images to put on a yarn bag and while this one was my personal favorite (and may yet make it on a yarn bag), I had to go with something slightly more mature on this particular project.


The winner was an adaptation of the 'Keep Calm and Carry On' signs.  When I researched these signs I found out that they were propaganda from the British Government during the start of WWII. The graphics are so fun and lend themselves to great adaptation as we've seen all over pop culture lately. I especially love the "carry yarn" because it sounds so much like "carry on" (it's the little things in life). This is by no means an original idea. A google image search will quickly show you that many individuals, more clever than myself, came up with this idea. Despite all the good adaptations that other people have come up with, none of them were quite perfect for my project so I came up with my own. I tried to keep the text as close as possible both in typography and spacing to the original. Here is the final result.

KEEP CALM AND CARRY YARN

Here is the mirrored image in case you want to print it and iron it onto any bags, shirts etc.

KEEP CALM AND CARRY YARN MIRROR IMAGE

Monday, December 10, 2012

Tips to a Beautiful Christmas Tree

In my house, it just doesn't feel like Christmas without a beautiful Christmas tree. Here are my tips and tricks for a beautiful Christmas tree.

Buying and Caring for Your Tree
  • Buy a real tree. I have never found an artificial tree that I couldn't spot from a mile away.  Not only does a real tree smell amaaazing, but the experience of shopping for one can become a family tradition that you will remember forever. 
  • When shopping for your tree, look for one that isn't too bulbous in the middle. A leaner taller tree that isn't too full will allow ornaments to hang nicely without getting caught or sitting on branches below.
  • Always make sure the tree sellers cuts a bit off the bottom of the tree stump, it will help your tree suck up water and last longer, just like when you trip flowers before putting them in water. 
  • When you fill your tree stand for the first time, use warm water...I don't know why. Just do it. And water your tree every or every other day. If you have a fresh tree it will lap up water like dog on a hot day.
Now to the fun part....
Decorating your tree
  • Start with the lights. First of all, make sure your lights have a green cord. Most Christmas lights do but I have a couple of strands with a white cord that stands out like a sore thumb on a tree. I used three strands on my tree but it will vary depending on how big your tree is. After you test your lights to make sure they work, start at the top and loosely wrap your lights in a spiral around the tree draping them on the branches, then go back and tuck the some lights inside the tree and move some higher and lower to eliminate the "string effect" so your lights look like they are floating in the tree instead of on a string. 
  • Once the lights are done, I like to use a wide (2") ribbon as a garland. You don't have to do this, but I think it ties the tree together nicely. Gold and red are great ribbon colors. While I love green and blue in other housewares, you want to choose a color that will contrast with the tree. Also an slightly sheer ribbon will glow when backbit by your lights. Spiral the ribbon around the tree, starting at the top and draping it on branches as you move down the tree. 
  • Now for the best part.. ORNAMENTS! I collect ornaments. If you're just starting out, do not hesitate to just buy a big box of generic ornaments to fill up your tree but as the years go buy, keep an eye out for unique ornaments to add to your collection and gradually they will replace your generic box set. Also, buy a box of clear glass bulbs and hang them deep in the branches to reflect the light and help your tree sparkle. Pick up a box of "icicle" ornaments. The long straight lines stand out on the tree, help reflect the light and add an extra sparkle. When you hang your ornaments, find branches that are strong enough to hold them up so they don't drag it down so far they are sitting on the branch below.
Christmas Tree Icicle Christmas Ornament


  • Once you've hung all your ornaments, top your tree off with a star or an angel, then grab a cup of hot chocolate and enjoy the sight and smell of your tree. 

Beautiful Personal Christmas Tree

Sunday, December 2, 2012

DIY Advent Wreath [Tutorial]

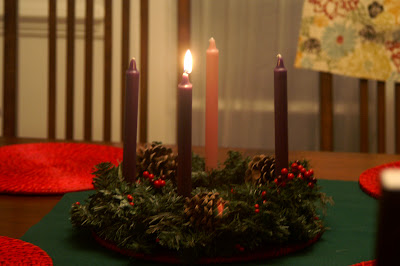
Today marks the beginning of advent and I like to light an advent wreath to help me focus on the real meaning of Christmas (cheesy, I know but trust me, I can get carried away). You can buy advent wreaths in all shapes and sizes and lots of them include a Christmas-y type wreath.

DIY Christmas Advent Wreath


You can find them for anywhere from $12- $50+ but since I already had a small wreath that I wasn't using, I decided to make my own. 

I actually made my advent wreath last here but it's very simple. 

Materials:
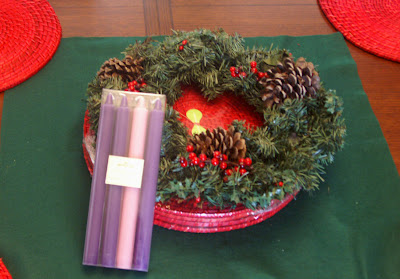
12-14" Artificial evergreen wreath (you can find these at any Michael's around the holiday)
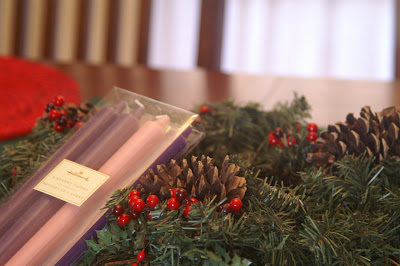
Advent Candles (Similar found Here)
Ribbons, pine cones, or any other decorations you'd like to use

DIY Advent Wreath Materials

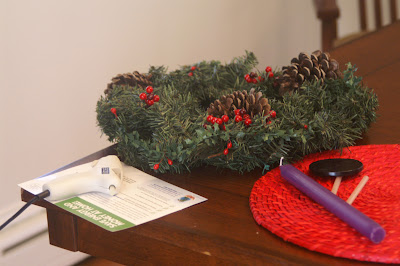
Lay your wreath on a flat working surface and place play with the layout decorations until you are happy with the arrangement making sure to leave a empty spot at your 12, 3, 6, and 9 O-clock on the wreath.
As you can see I used pine cones and artificial berries and ivy. Once you are happy with the look, attach the decorations using a hot glue gun (or other craft glue).

DIY Advent Wreath Materials

I just hot glue my advent candles onto the wreath like any classy lady would but if for some craaazy reason you don't feel comfortable having glue that melts under heat holding up something on fire, there are lots of small tapered candle holders that could be purchased at the Dollar Store or Michael's or online and glued onto the wreath to hold up your candles. 

DIY Christmas Advent Wreath

If you like to have a 5th white candle for Christmas day, just get a pillar candle and set it in the middle of your wreath. 


Have a blessed advent!